The year 2025 was not a great year for my artistic progress. I did almost no painting. On the other hand, it was a great year for travel. Greg and I loved every minute of our time on the road, and I have no regrets.
When we got back home, though, I was determined to get back to painting. Unfortunately, the artistic block that has been plaguing me for the last few years had become a metaphorical cement wall so tall and wide that I couldn’t figure out how to get past it.
After floundering for months, feeling guilty because I talked a lot about painting but never actually did any, I realized that a large part of my paralysis was due to the fact that I needed to acquire additional skills in order to improve, but I didn’t know how to go about acquiring them.
I finally decided that I needed to allow myself to experiment, which meant that I had to be prepared to make really bad art…and possibly for a long time. (Not that I’ve exactly been making “good” art up to now. LOL) I consoled myself with the knowledge that although I may run out of lifetime before I get to the point where I feel like an “artist,” I won’t get there any faster by doing nothing.
With the decision made to experiment and completely let go of the final result, my block dissolved. I’m painting again! So here are a few of my recent efforts.
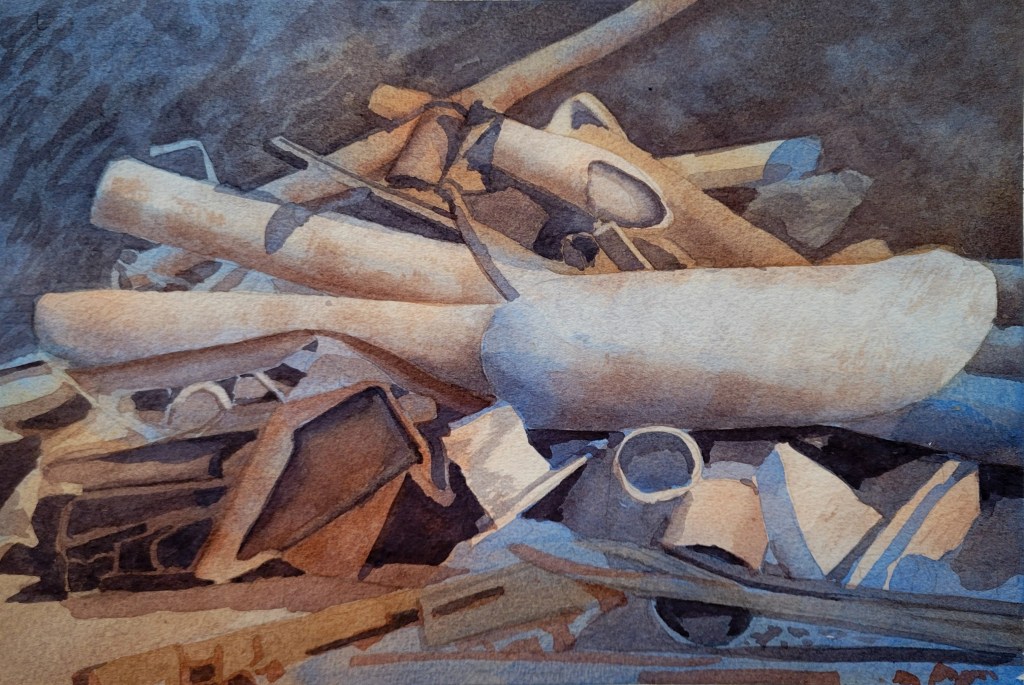
This painting is the last painting I did from Rick Surowicz’s Negative Painting class. I was working on finishing up his course before we left for our trip out west. If you want to see the other paintings I did from this class, you can see them here. Basically, negative painting involves painting around a subject in order to reveal its form. I chose a reference photo of a bunch of old, rusty pipes in a junkyard because the scene gave me lots of contrast and opportunities to paint around things.
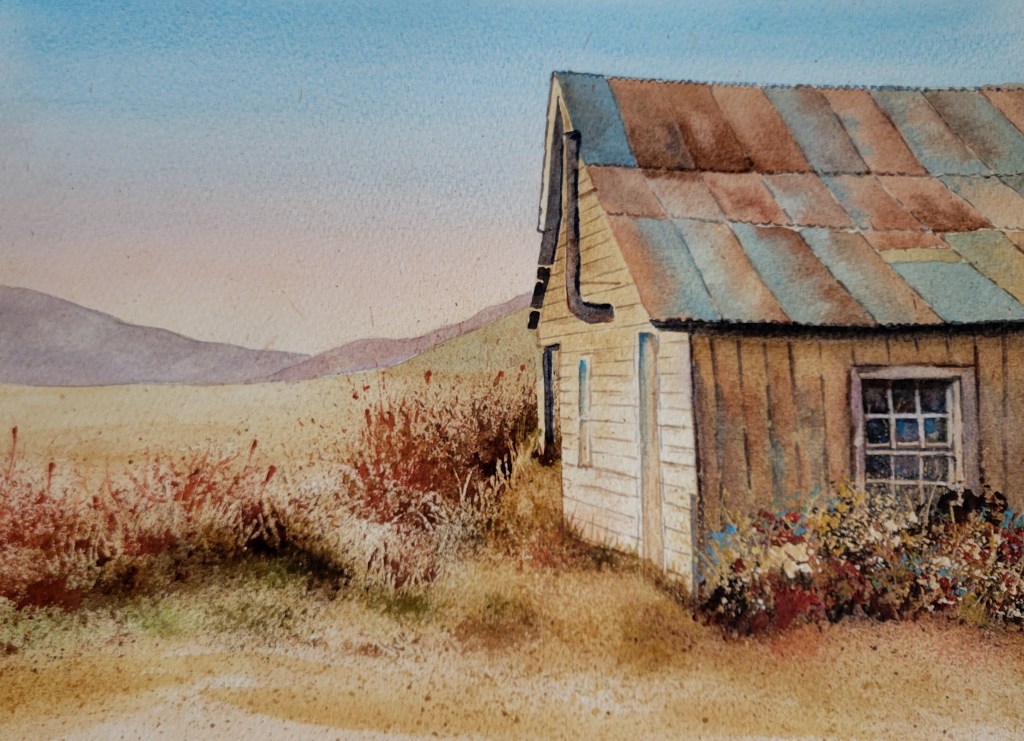
I am currently taking a Texture Techniques class with Bradley Hendershot. If you’ve never seen anything that he or his father Ray have painted, you are truly missing out. Their paintings are gorgeous, and they are true masters of creating texture in their paintings.
Anyway, the purpose of this assignment was to use the spattering technique to create foreground foliage. With the spattering technique, you load a stiff-bristled brush like a stenciling brush with paint in just the right consistency (no easy task!) and then use your finger along the bristles to spatter the paint onto the paper. Getting the right angle is quite the trick. The wall in children #3 and #4’s bedroom is well decorated now. (Don’t tell Greg.)
When I first showed this painting to Greg, there was dead silence. I finally explained, “I was practicing creating texture,” to which he replied, “Well, there certainly is texture!”
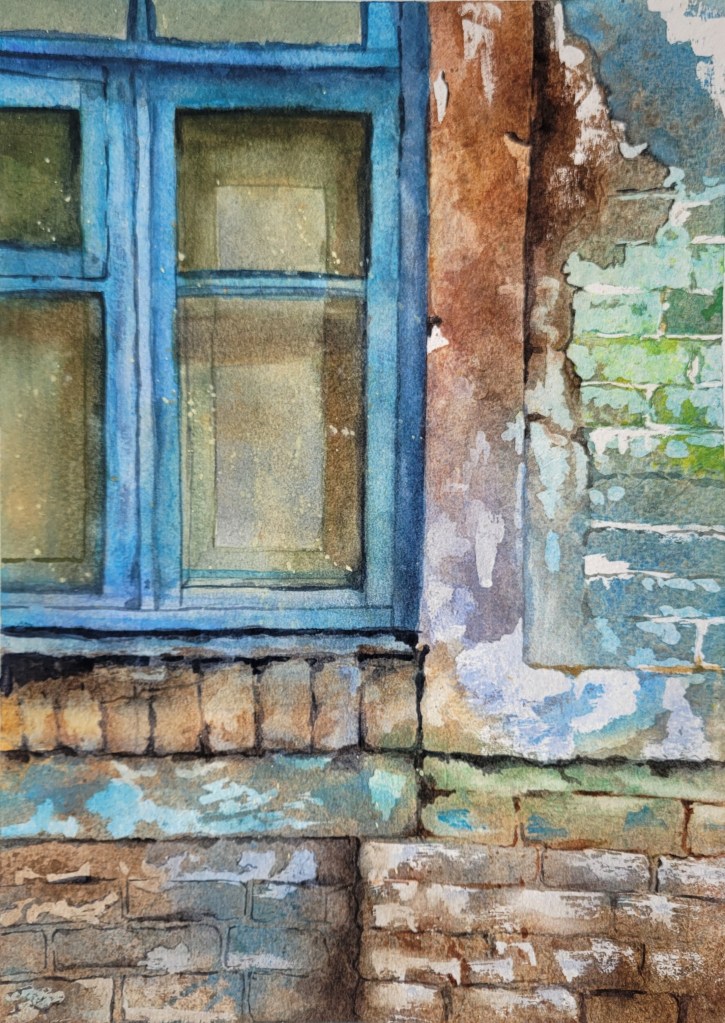
You can’t tell by looking at this painting, but I basically threw every texture technique I could think of at it. I used masking fluid. I dripped paint all over it and then tipped the board every which way to get it to flow together. I pounded the wet paper with the plastic device I use to open tubes of watercolor paint. I used a ruling pen to create lines through the wet paint. I took a water misting bottle and rolled it around in the wet paint. I spattered. I used the dry brush technique to make the wood of the window look older. I lifted out parts to create lighter areas. And what did it get me? Not much, honestly. Oh, well. I love the colors. LOL
Our assignment for this week is to create snow-capped mountains by scraping paint off the paper using a a razor blade. Hopefully, I can produce something realistic-looking without bleeding all over the paper.